A snug & beautiful entry for 7!
- Neyir Urminsky
- Nov 18, 2021
- 4 min read
Welcome back for the final reveal of another iteration of the One Room Challenge. The ORC is an amazing event that happens twice a year that anyone can join with the goal to finish one space in their home :-)! Please hop over and check out the featured designers and the other guests like myself. To get caught up on my vestibule vivication plans check out post 1 , post 2, post 4,and post 5 & post 7 here. Don't get distracted looking for post 3 or 6, it just didn't happen :-).

Sooooooo the vestibule is done, it is shiny and gorgeous! The boys came home from school yesterday and suitably oohed and ahhed....and then filled it up with all their stuff! All. Four. Of. Them! Alas, if I design it they will come haha.

Now before we jump into all the beautiful after shots and talk about the wonderful sources let us take a little trip down memory lane. This is how we started. This is a mid 60s side split house with 5 bedrooms, housing 7 people. This home has almost no built in storage.
Read a small closet in most bedrooms and 1 other closet for everything else! This little vestibule at roughly 6x4 feet needed to be an easy access zone to drop & store things that people could move through fairly quickly and still somehow not look as if it was hit by a tornado twice a day.

So even before we bought the house I knew that this closet had to go! If fact do you see how there is no closet door on pic above? I took it out the day we took possession along with the shower door in our minuscule ensuite but that is a story for another day, or blog. 2 years ago we hired someone to take out the closet and open everything up and build my mom a closet because there wasn't one in her room. It took 25 months but it is finally finished!
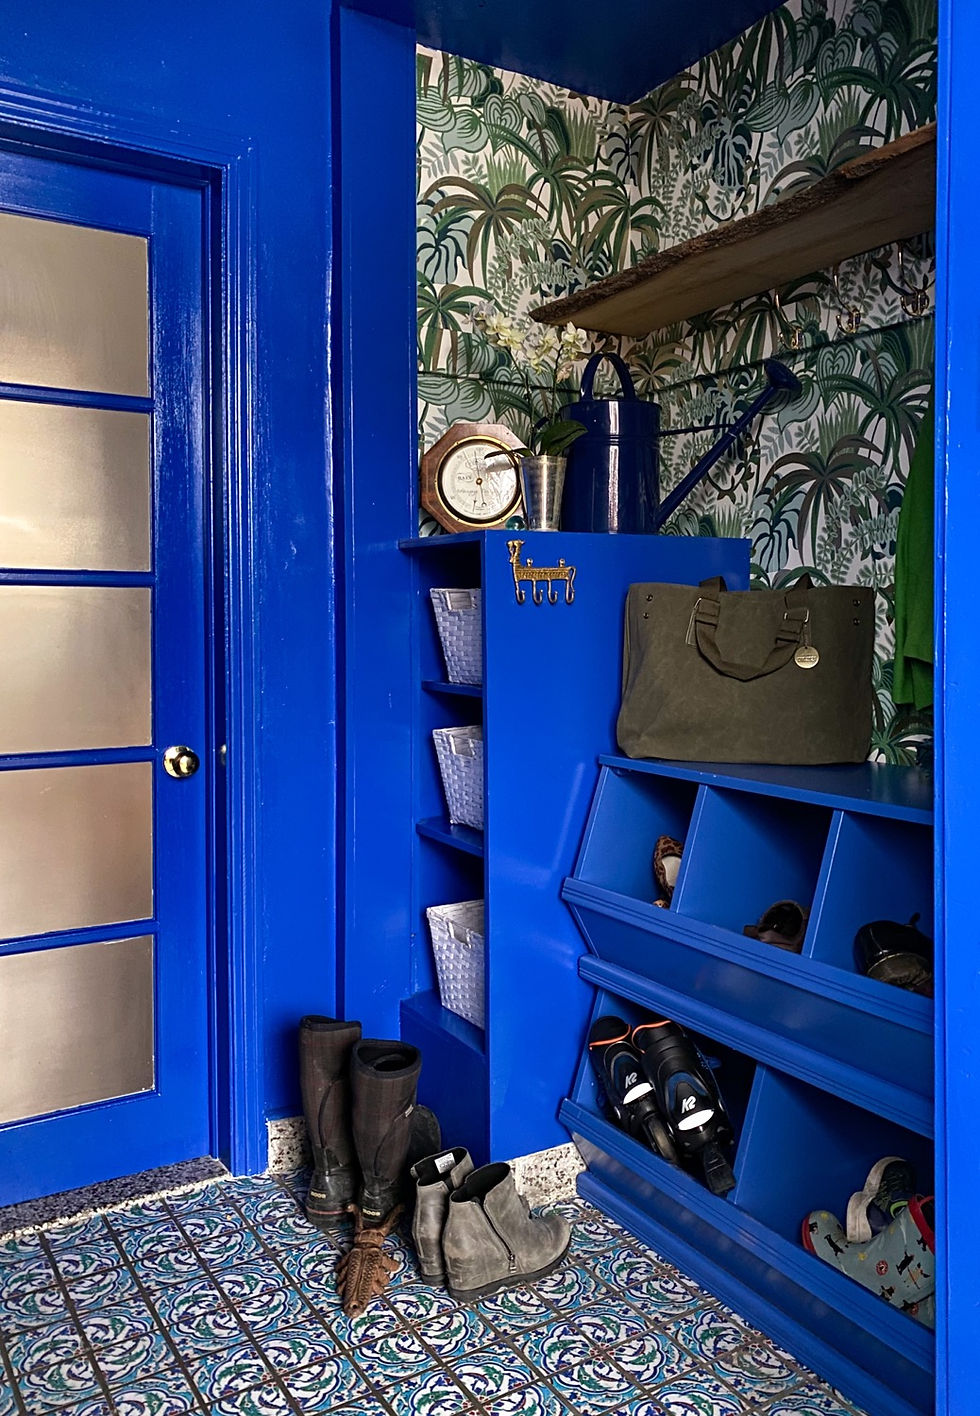
So once is was opened up the trick became making it as functional as possible. We had 3 cubbies added and hooks were a given for coats, snowpants etc. After lots of experimenting I settled on what I believe to be the most amazing shoe storage system. You can find more info here. Then I got to choose all the finishes and this is where we landed;
And here's the same angle from the shot above after the closet came out;


Now let us talk about functionality because it doesn't matter how pretty it is, if it doesn't work it is just going to become a dumping ground! We have the new shoe storage which is working great. It is also flexible so in the winter we will be taking out one of the sets of bins to allow for longer coats and snowpants to hang. I hung my longest coat and there is room to spare! If we still want more space we will take out both cubbies and just have a tray for boots. I am so, so pleased with this system, the boys use it and it is so much prettier than shoe racks filled with 7 people's shoes! I added 10 of these beautiful solid brass hooks, they are excellent quality and were very easy to install. The cubbies will house different items at different times of year. The top basket is re-usable masks at the moment, then sunscreen, hats, mitts, tuques & gloves are all items that rotate through the bottom two baskets.

The floor!!!! Once the closet was opened up I was left with the old floor plus parts that were filled in with concrete. For a bunch of reasons I go into here I didn't want to demo out and install a new floor. I settled on these wonderful non-slip vinyl tile stickers and so far so good! We all love them and they feel really cohesive with the Turkish carpets that are in the next room.

Finishes. I had a lot of trouble deciding on the right blue but I continued to love the Behr Beacon Blue which I had mixed at 50%. The wallpaper I have had for over a year but isn't currently available. It was my first time wallpapering and I am now itching to do it again!
The gorgeous mirror I managed to find on FBMP (FaceBook Marketplace) for $50 and I love it. The scale is just right and the bamboo detailing speaks well to the wall paper on the opposite wall. I may or may not have nicked the hole I had just patched in the wall installing it. Dear Friends do not install heavy mirrors on your own, your walls will thank you!

But truly the piece to resistance in the finishes is the raw wood shelf. With all the other more glam elements in the room I needed something to ground the space. I have a stack of wood (properly stacked for all you wood lovers out there) that I inherited from my Father who was a wonderful woodworker. If you go back to the initial mood board you will see I originally intended to incorporate mahogany into the space. 2 of the boards are beautiful mahogany but once everything was in I knew that wasn't the right choice. I spent a morning going through all the pieces and discovered this wonderful live edge piece of oak which my Father planed himself. It is just the right note of rough in an otherwise polished space and it warms my heart and makes me smile every time I see it!

So that's it folks, another ORC wrapped. I have lots of things planned for over the winter months to share with you. Remember to keep an eye on my Instagram where I share lots of behind the scenes. Thanks for coming along for the ride!


Very NICE!! I really love the natural wood slab shelving.. the bold blue color is very striking and welcoming... love it.. and congrats on a job well done